How to Make Pour-Over Coffee: A Simple Routine
- How do you make pour-over coffee?
- What do you need?
- What grind should you use?
- What water temperature should you use?
- The beginner recipe
- Step 1: rinse and seat the filter
- Step 2: add and level the coffee
- Step 3: bloom the grounds
- Step 4: pour to the target
- Step 5: drain and remove the brewer
- What should a normal brew look like?
- Common beginner problems
- Is a gooseneck kettle necessary?
- Sources
How do you make pour-over coffee?
Start with 20 grams of medium-fine coffee and 320 grams of water for a 1:16 ratio. Rinse the paper filter, add the grounds, then pour 40 grams of water and wait 30 to 45 seconds. Continue in small, steady pours until the scale reaches 320 grams. Let the bed drain, taste the cup, and adjust only the grind on the next brew if it ran unusually fast or slow.
That is Moav Coffee Journal's beginner routine, not a universal competition recipe. Cone shape, filter, coffee and kettle all change flow. Follow the dripper maker's capacity and assembly instructions, then use one stable starting recipe long enough to understand what a change actually does.
What do you need?
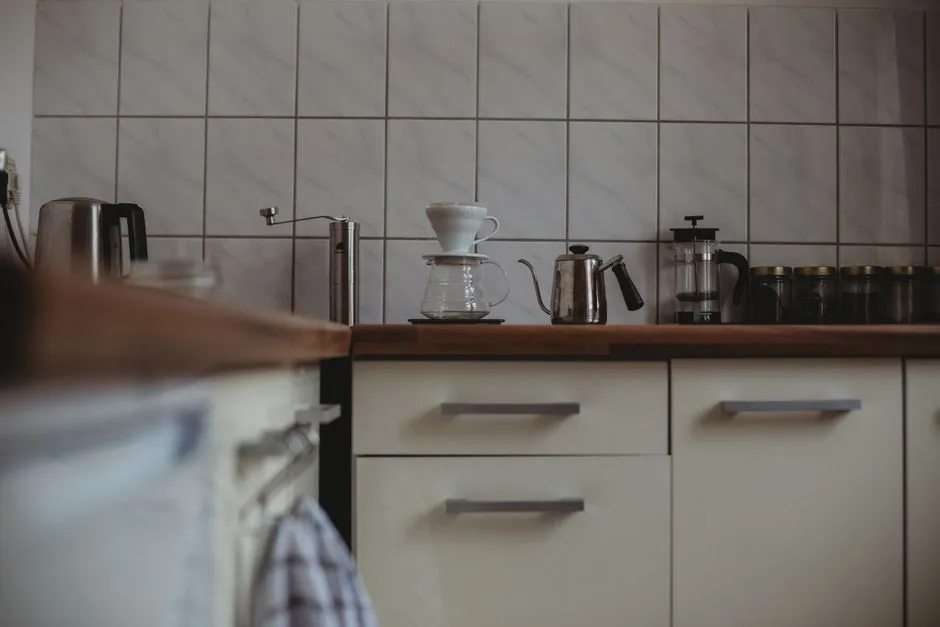
The basic setup is short:
- a pour-over dripper and its correctly sized filter;
- a mug or heat-safe server that supports the dripper securely;
- freshly ground coffee;
- hot water;
- a kettle or controlled pouring vessel;
- a scale and timer, if available.
A scale makes the coffee and water repeatable, but it is not mandatory. A measured spoon and known kettle volume can get you close. A gooseneck kettle makes a narrow, controlled stream easier, but a small conventional kettle can work if it pours cleanly without surging.
Keep the setup stable. Place the mug or server on a level counter, keep the handle clear, and do not balance a dripper on a vessel it does not fit. Hot water causes serious burns. Pour away from the body, keep children and pets outside the working area, and stop if the brewer, vessel or kettle is cracked, unstable or damaged.
What grind should you use?
Begin around medium-fine: finer than typical coarse French press grounds, but not a powder. The exact grinder mark is not transferable between machines. Record the setting on the grinder you own.
Grind changes how quickly water moves through the bed and how much surface it can reach. If water races through and the cup tastes thin or sharply sour, try one step finer while leaving the dose, water and pouring pattern unchanged. If drainage stalls and the cup tastes harsh, drying or bitter, try one step coarser.
Taste matters more than reaching a borrowed finish time. A fast or slow brew is evidence to examine, not an automatic failure. Filter design, coffee freshness and pouring all affect the clock.
What water temperature should you use?
Start near 93°C, or 200°F, and adjust only after the grind routine is stable. The Coffee Association of Canada gives 200°F, approximately 93°C, as a professional brewing benchmark. That is a useful starting point rather than a requirement for every coffee.
Without a temperature-controlled kettle, bring fresh water to a boil, switch off the heat, and let the most violent bubbling settle before pouring. Do not attempt to judge hot-water safety by touching steam, kettle walls or the stream. Use the kettle's handle and follow its manual.
Darker coffee may taste more balanced with a slightly cooler start; a light coffee may tolerate hotter water. Treat those as tasting adjustments, not fixed roast rules. Change temperature after you have controlled dose, grind and flow.
The beginner recipe
This recipe makes one moderate mug.
| Item | Starting amount |
|---|---|
| Coffee | 20 g |
| Total water | 320 g |
| Ratio | 1:16 |
| Bloom water | 40 g |
| Bloom wait | 30–45 seconds |
| Starting water temperature | about 93°C / 200°F |
The arithmetic is direct: 20 × 16 = 320 grams of water. The 40-gram bloom is twice the coffee dose. For another batch, multiply the coffee dose by 16. If the dripper manual sets a lower safe capacity, make a smaller batch rather than filling above it.
Our published coffee-to-water ratio guide explains how to scale the calculation. The brew-methods category provides other ways to make coffee when pour-over does not suit the morning routine.
Step 1: rinse and seat the filter
Fit the filter exactly as the dripper maker shows. Rinse it with hot water, then discard the rinse water before brewing. Rinsing helps the paper sit against the brewer and preheats the mug or server.
Hold the brewer by a safe outer surface if it needs adjustment. Do not reach under a dripper containing hot water. Check that the filter has not folded over or blocked the outlet.
Step 2: add and level the coffee
Add 20 grams of freshly ground coffee. Gently shake the dripper once to settle the bed into a roughly level surface. Do not pack or press the grounds.
Set the brewer and vessel on the scale and tare to zero. If the display will be hidden by the server, reposition the setup before adding hot water. Start the timer immediately before the first pour.
Step 3: bloom the grounds
Pour 40 grams of water across the dry bed, aiming to wet all visible grounds. Wait 30 to 45 seconds. Fresh coffee may release visible gas and swell; older coffee may show less movement. Foam is not a quality score.
If dry pockets remain, use a small amount of the planned bloom water to reach them. Avoid forceful stirring on the first attempt because it adds another variable and can disturb the filter.
Step 4: pour to the target
Continue with a narrow, steady stream. Use two or three pulses, allowing the water level to fall somewhat between them without exposing the bed completely. Move gently over the coffee rather than pouring continuously onto the paper wall.
Stop when the scale reads 320 grams. The water still inside the grounds and dripper is part of that total; do not add extra water simply because the mug contains less than 320 grams of finished coffee.
Keep the kettle spout low enough for control but clear of the dripper and slurry. A gooseneck helps here because its narrow spout limits the stream. It does not correct the ratio, grind or target weight by itself.
Step 5: drain and remove the brewer
Let the remaining water drain until the stream becomes a slow drip. Remove the brewer before the bed sits dripping indefinitely. Place it on a stable heat-safe dish, not directly on a counter that can be damaged by heat or liquid.
Swirl the server carefully to mix the brewed coffee, then let it cool enough to taste safely. Do not judge flavour while it is hot enough to burn the mouth.
What should a normal brew look like?
The bed should wet without overflowing the filter, and the brewer should drain without the water disappearing instantly or remaining stalled for many minutes. A mostly level final bed is helpful evidence that the pour was controlled, but it is not a guarantee of even extraction.
Write down the coffee, dose, grind setting, water, approximate temperature, total weight and brew time. The record matters more than hitting one prescribed time. It lets you repeat a good cup and identify what changed in a poor one.
Common beginner problems
The brew runs very fast
Confirm that the filter is seated and the grind is not much coarser than intended. On the next brew, move one grinder step finer. Do not compensate by adding more coffee and changing the pour at the same time.
The brew stalls
Check for an overly fine grind, a folded filter or aggressive pouring that moved fine particles into the filter. Try one step coarser next time. Do not lift or squeeze a hot filter to force drainage.
The cup is weak
Verify the measured dose and water first. If the ratio was correct and the brew ran quickly, grind finer. If the ratio was not controlled, repeat it before diagnosing extraction.
The cup is bitter or drying
Let it cool and taste again. If the brew drained slowly, grind slightly coarser. If drainage looked normal, test a modestly cooler water start or a different coffee, one change at a time.
Is a gooseneck kettle necessary?
No. It is a control tool, not an entry fee. A gooseneck is most useful when a wide conventional spout surges, splashes or makes small pulses difficult. Before buying one, practise with the kettle you own over an empty dripper using cool water. If you can start, stop and direct a narrow stream cleanly, keep it.
If you buy a kettle, check capacity, handle clearance, lid security, cord placement, temperature controls and the manufacturer's cleaning instructions. Never pour from an overfilled kettle or continue using one with a loose handle, damaged cord or unreliable shutoff.